To produce dovetail joints there are two extremes: Working by hand with a saw and chisel or with the router and a device for finger joints such as the WoodRat.
The prongs manually is actually not very difficult, only the working out of the tines is relatively time consuming. It does not matter if you work only with the chisel or with a combination of Beitel and scroll saw.
In the operation described now I have used combined hand tools and router to work noticeably accelerate.
The material I have some cheap glued panels used here from the hardware store.
rough surface. At this price, of course, is to be expected not a very high-grade material, but quite useful for such experiments.
The result is a simple box or a simple chest, whereby the dimensions of the offered material yield. Since the glued panels are 80cm long, this is also the length of the box, just as there is the width of 30cm.
When side panels so come each 2 plates used for the faces two sections are sawn from 34cm length. Why this measure? Now, the material thickness of 18mm must be taken into account, because I want to use for the ground one of the glued panels on their full width.
The Swallows
First step is the production of the swallows. Here you can save time in that they are made in pairs. This is possible because the two cuts parallel to the wooden surface of both plates.
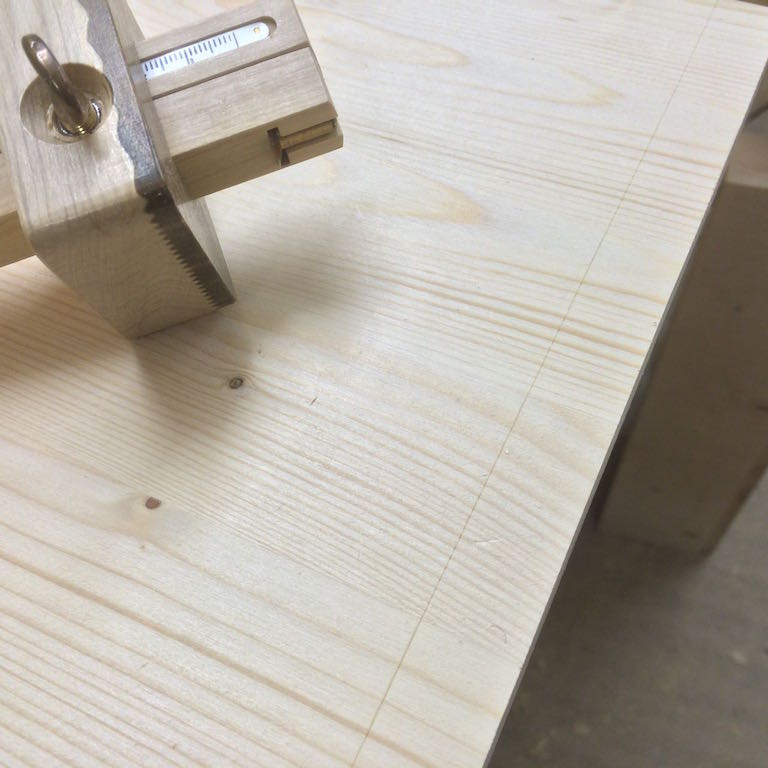
With the marking gauge the thickness of the wood is removed and is characterized at both ends.
Here it turned out that the boards are different thicknesses - not only between the individual plates but also from one side of the plate to the other. A plate is left 16.4 mm thick, but almost left 18,9mm - more than 2.5 mm difference. This I will therefore use later as a floor.

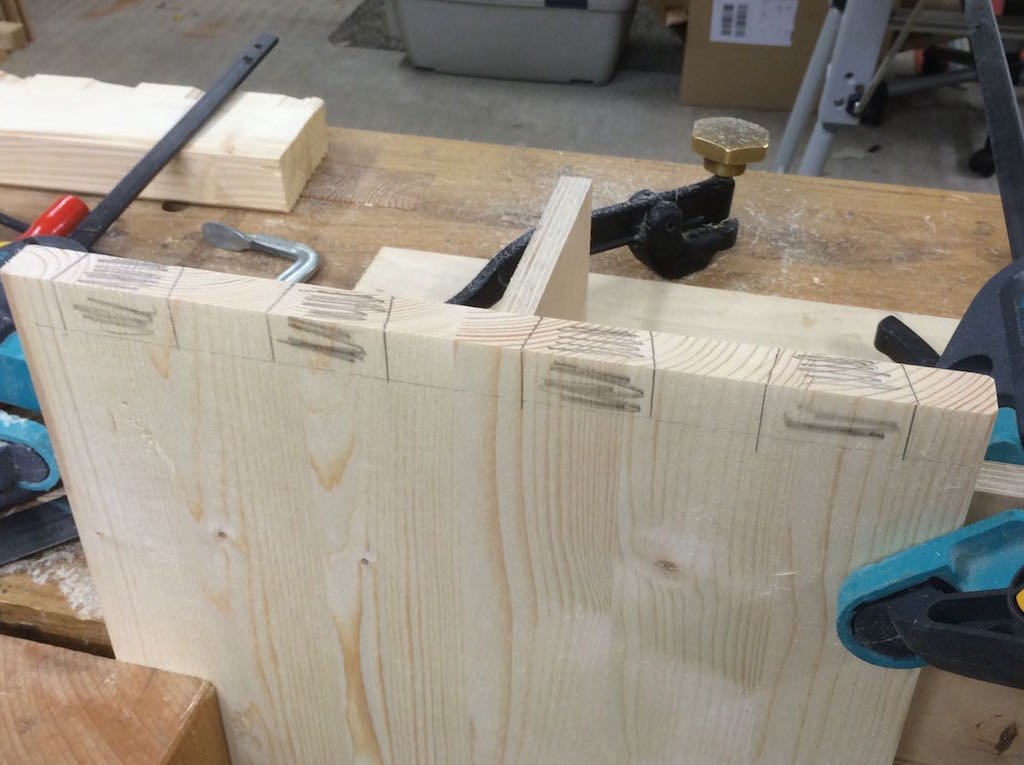
With my installation angle, the two plates are clamped to the workbench and swallows it be marked with the zinc template. The distances can be freely chosen, that is, it is done by eye everything.
All the wood is to off later, will be clearly marked to avoid careless mistakes.
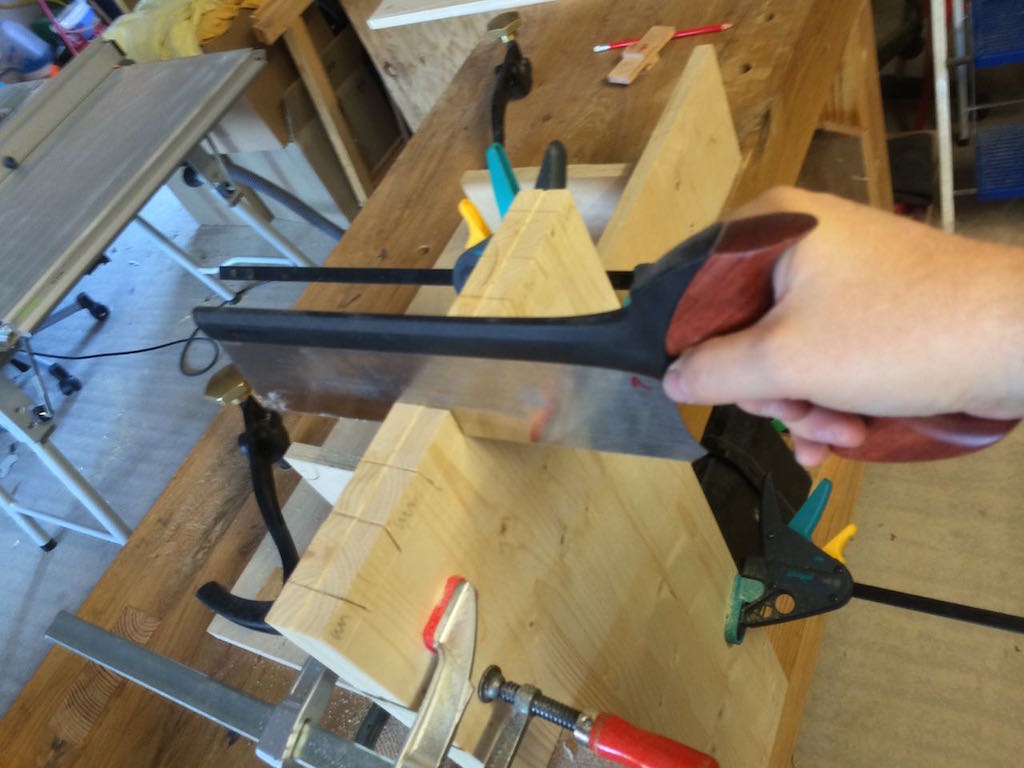
With a back saw the cuts are placed - this is always cut in addition to the line drawn in the area of material to be removed. So the dimension lines remain visible and the saw can be performed easily.
After all saw cuts are carried out, a rectangular wooden victim is additionally spanned 3cm flush with a cross-section of approximately 3 * at the rear of the two boards.
Now, the router is used.
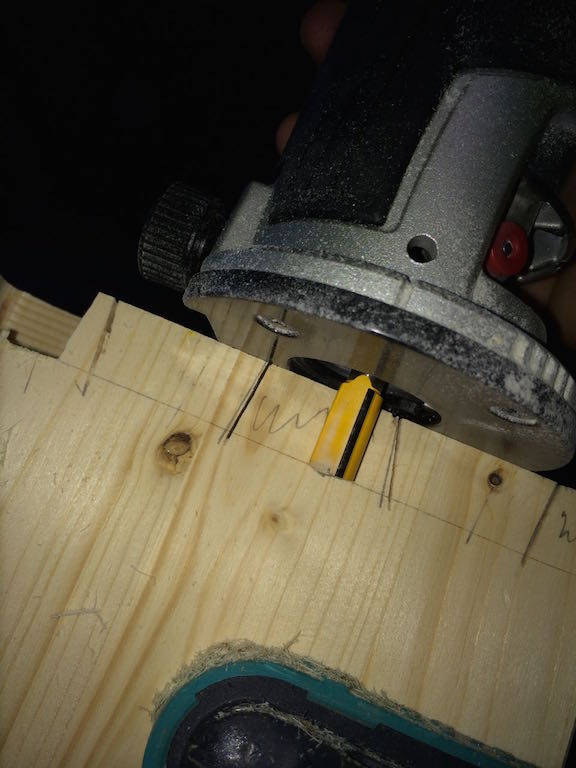
In my little Makita Hand cutter I used a 12mm end mill and adjust the depth on material thickness. Switch on the machine and gradually by milling the material between the Swabians.
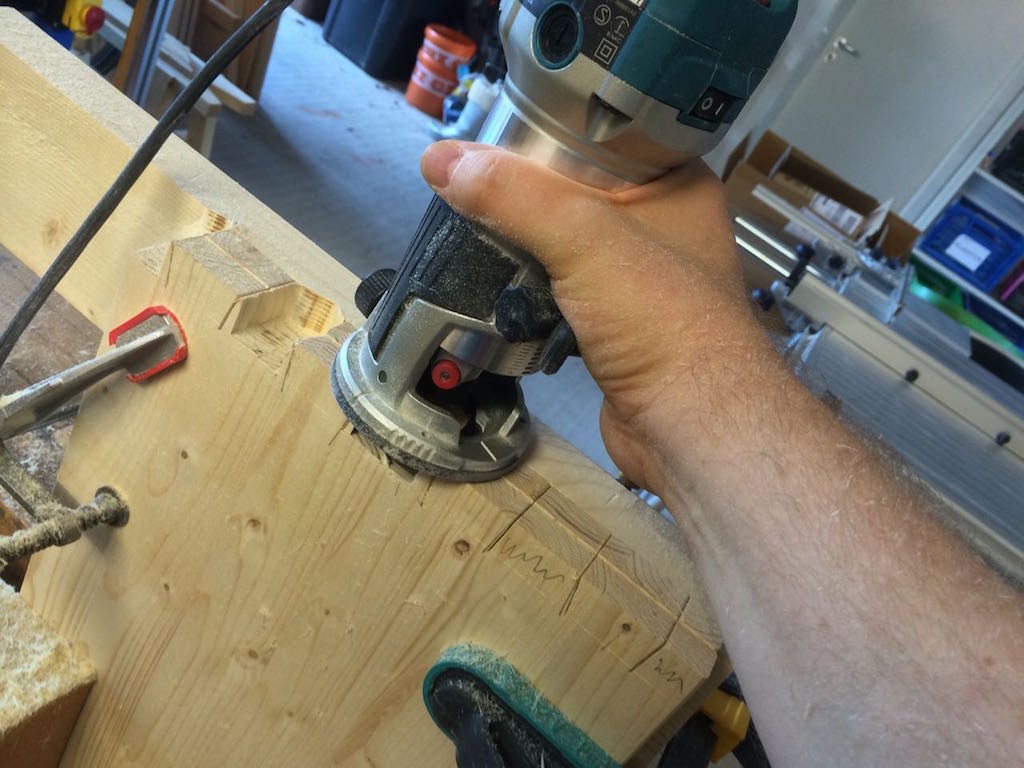
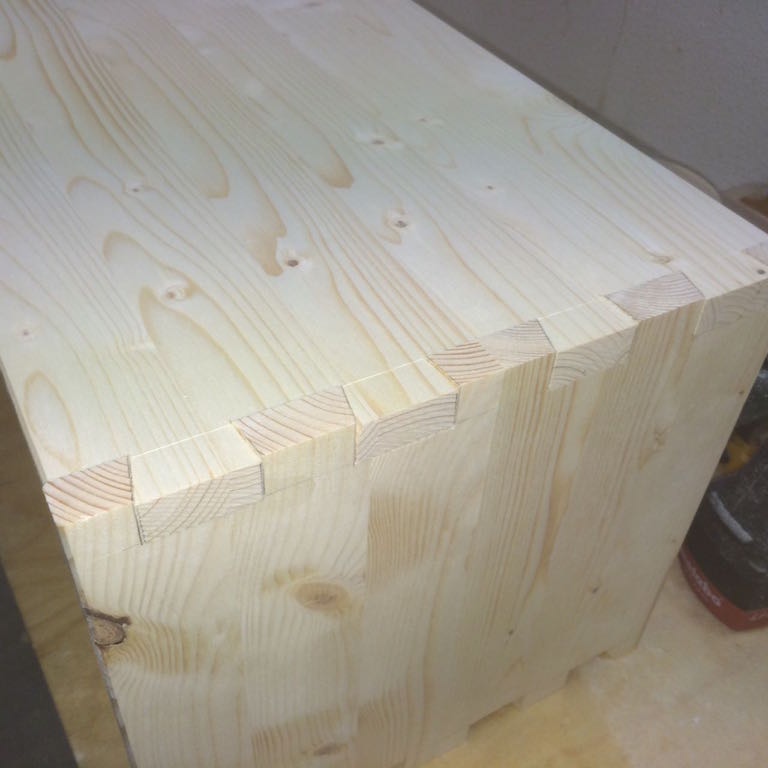
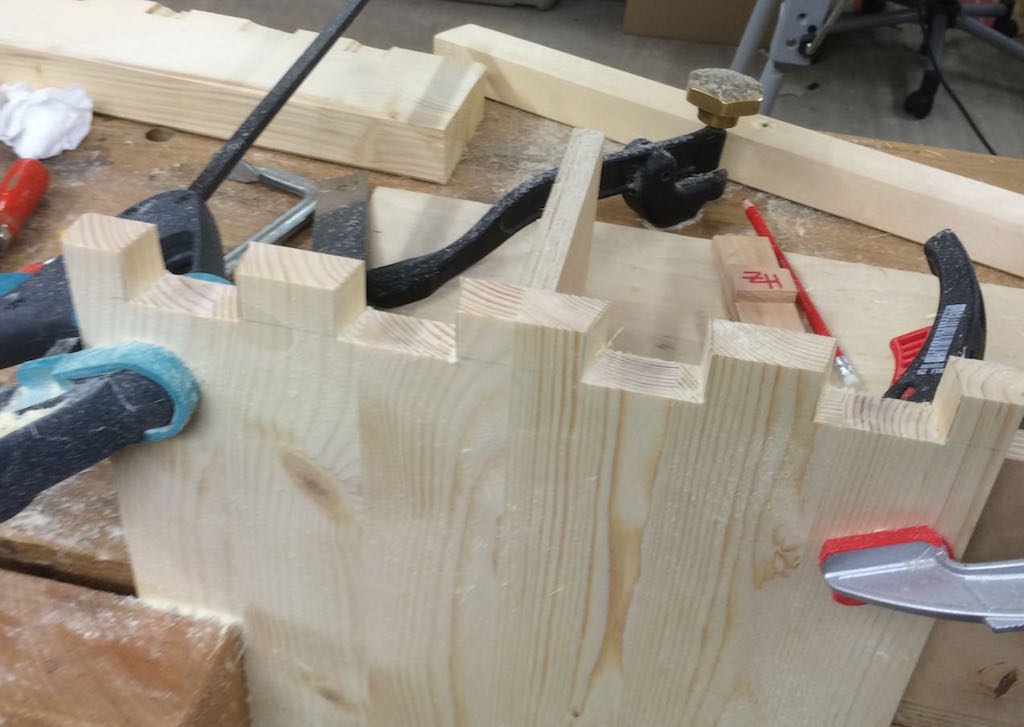
When this goes on 3-4mm deep layers from front to back abfräst all without pressure and vibrations. Here are the results after milling.
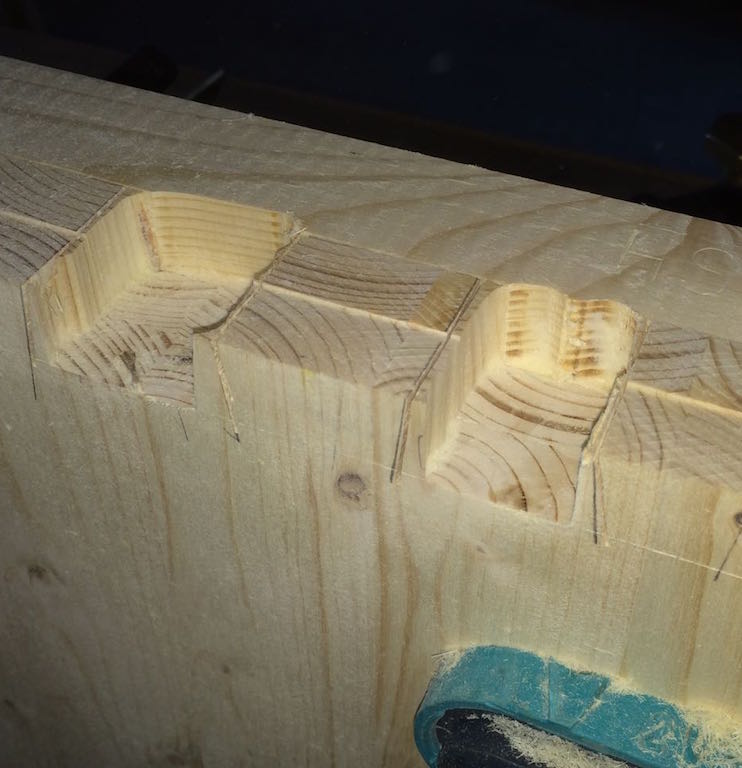
The zinc base is very nice uniform and smooth. Naturally at your sides a little rest stops because the end mill there is only straight edges. (Can mill a zinc mills of more than 18 mm long edges I did not)
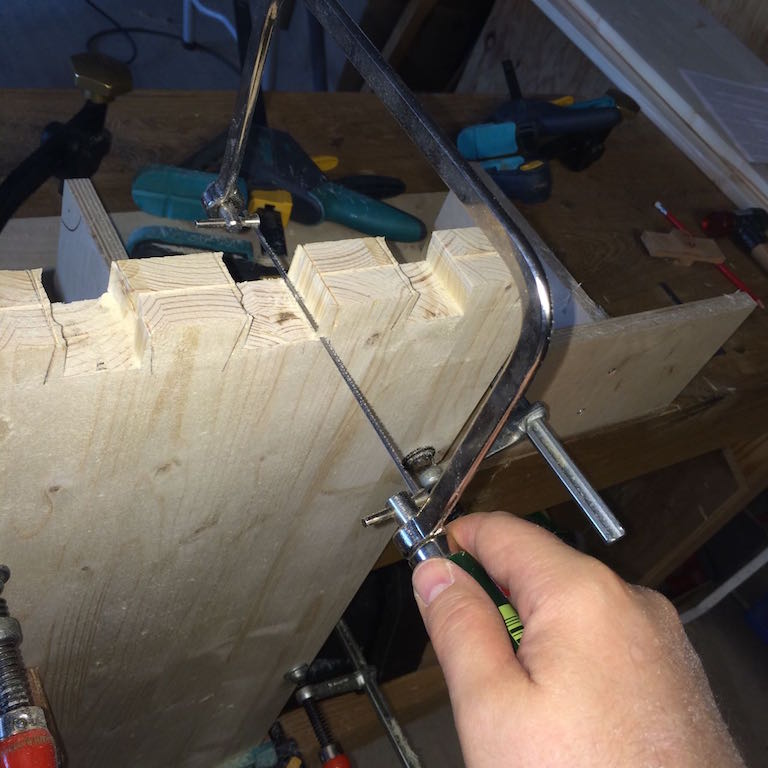
But that's no problem. With the scroll saw these residues are removed quickly. The here and there residual ridge can be reworked with a sharp chisel.
Now repeat the whole thing again on the other side of the side pieces and the swallows are done. After almost 50 minutes, I was at your first destination.
The tines
It continues with the tines. Here, the parts can be processed only singly, since the tines are inclined backward. However, the side surfaces are perpendicular and so you can work out the spaces completely with the router.
The side panels with the swallows are placed and transferred the exact curves of the edges with the sharp pencil. The herauszufräsende material is also selected again.
Again a victim wood is clamped behind the board to increase the bearing surface for the router again. Another measure is the installation of a larger base plate at the Makita router.

In addition I have changed the square base plate from swiveling Fräskorb on the vertical hand-held food hamper. Thus, the cutter has a wider circulation and can be performed more easily horizontally. Since the cut surfaces of the teeth are perpendicular, can be dispensed with the sawing. You can deal directly with the mills gradually to the pencil lines
approach to work.
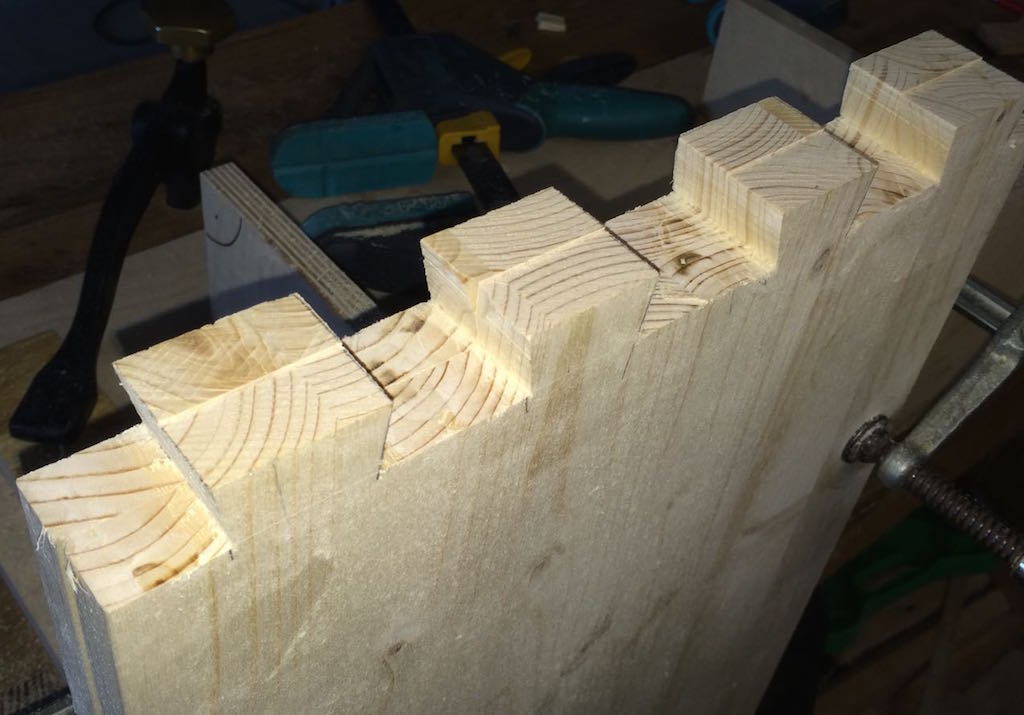
Here is the result of the milled teeth:
In the same way the other three sides are processed.
The assembly
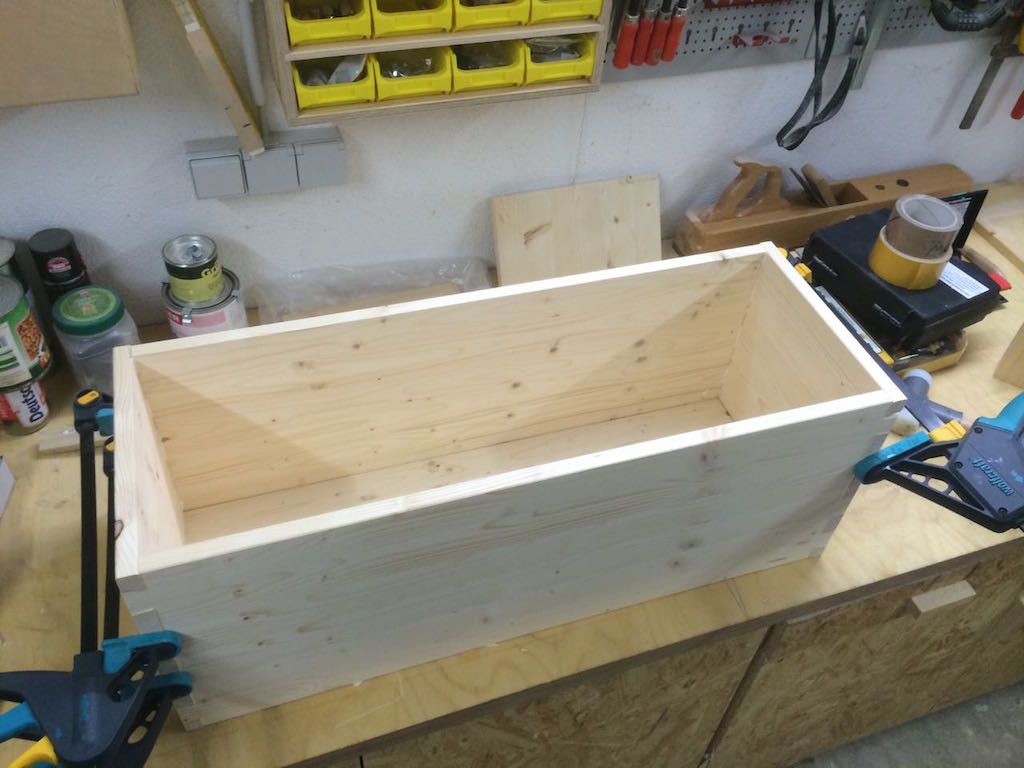
This was followed by a first test of how well the milled swallows and tines fit. Without glue everything was assembled.
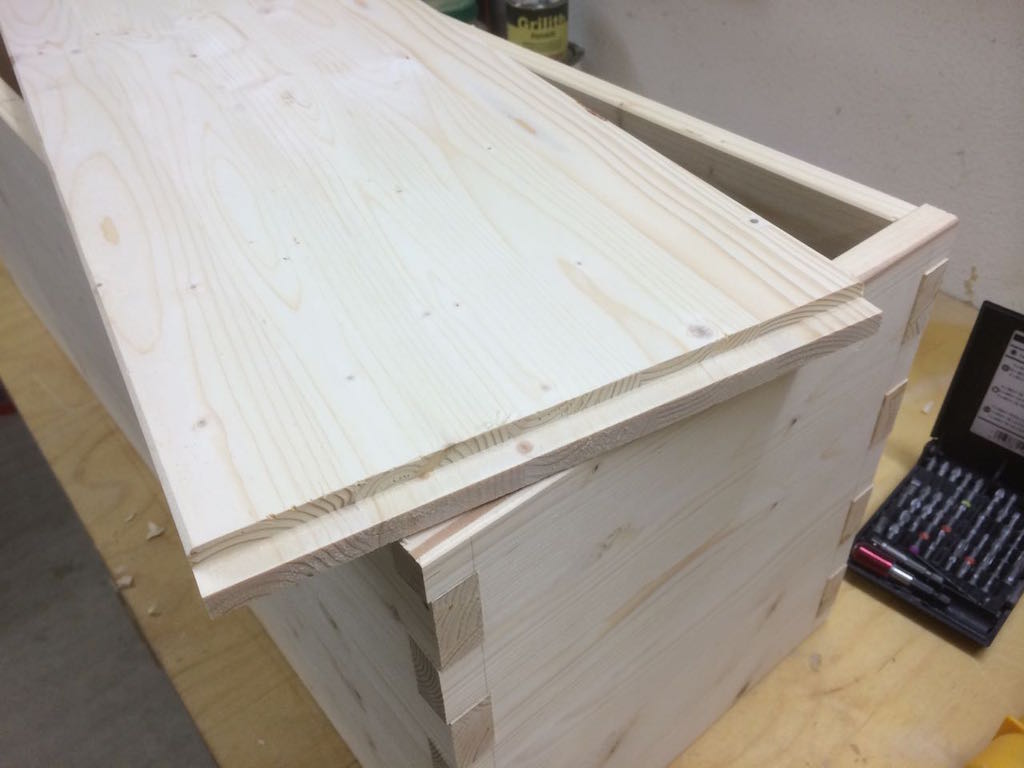
The swallows and tines sit surprisingly well at first, the connections are tight and no gaps. While projecting the prongs because of fluctuating thickness of Leimholzbretter something out, but with the plane or the belt sander that is smoothed later quickly.
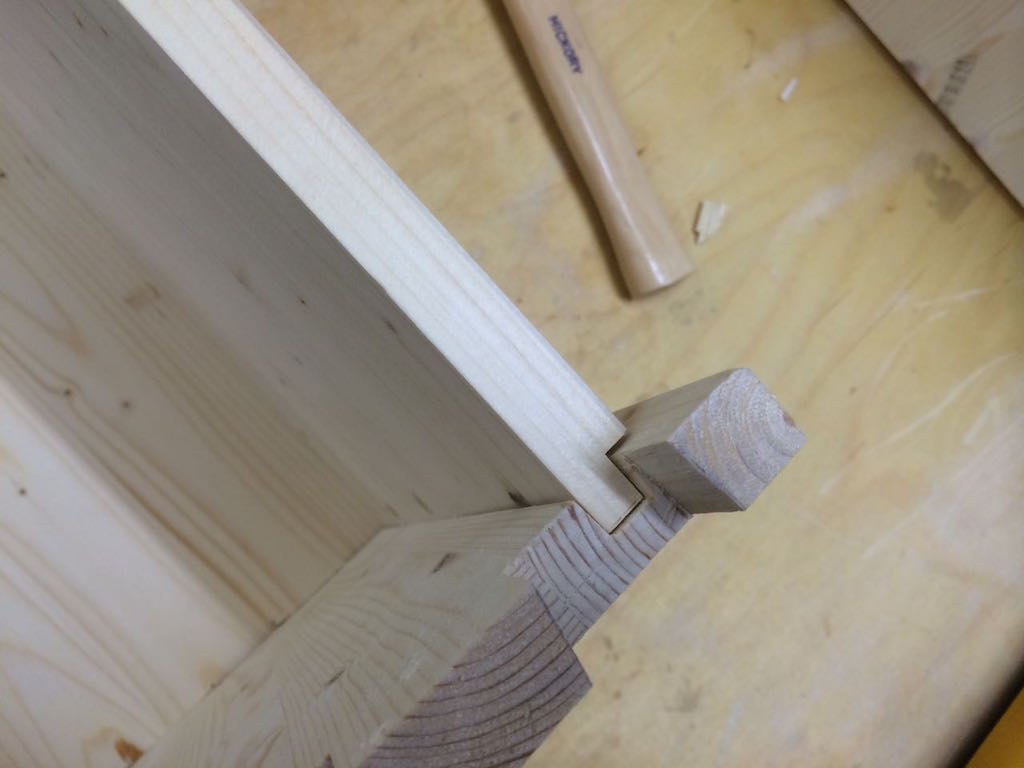
The bottom of the chest is milled on the longitudinal side at about 10mm depth. This is done with the router, a 12mm cutter and mounted stop rail. An approximately 10mm deep groove is milled then in the narrow side parts with the 10mm cutter, which is performed with about 2 cm distance from the edge.

In this groove the floorboard is then used without glue. Thus the ground is securely anchored and can still work side in humidity.
Then, the tines are all glued and fixed with one hand clamps to cure the Weißleims.
A first conclusion
The use of the router while working out the prongs worked better than I thought the first. If you look at gradual approach scans you get with the freehand guided routing machine very exact swallows and especially a smooth zinc base. However, the router used must be small and portable. Here the little Makita RT0700C has proved very successful. With my midsize Festool OF1010 that would surely be already borderline.
But the experiment was worth it. The manufacturing of all zinc compounds and preparing the ground took less than 3 hours - including a short coffee break.
Turbozinken40
And what's the downside? At the end you have a lot of fine shavings all around the workbench around. Because you need a clear view of the router, you can not suck unfortunately. To wear goggles here is required!
At the end of this workshop day, therefore change of clothes and a shower is inevitable.


0 comments:
Post a Comment