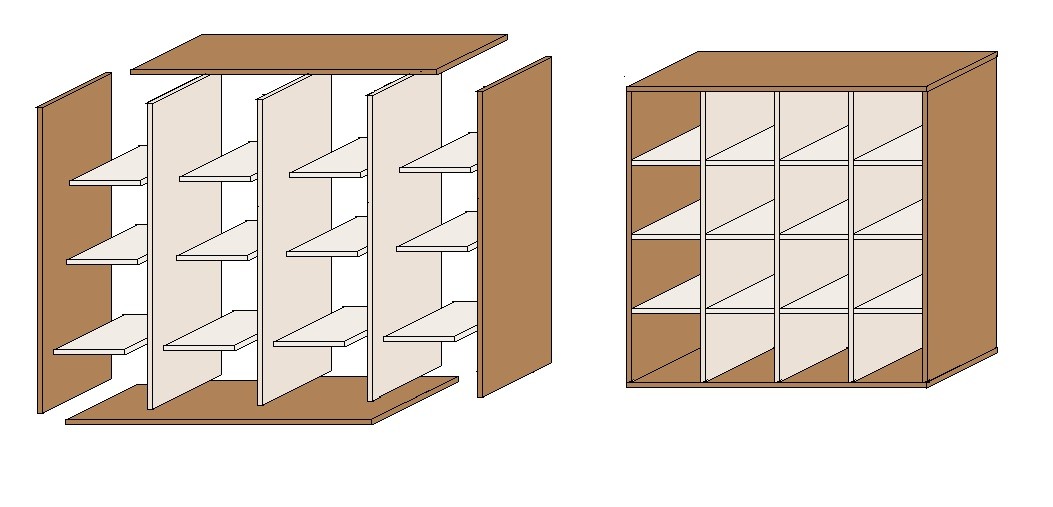
If you want to match the painted room divider later the room, also no need to use solid wood, but can also draw on a more cost-effective wood-based material. An idea for a room divider for reworking now presents the following instructions. Here, a classically simple room divider is built with 16 35cm large fields. Similarly, the room divider can also be made, of course, larger or smaller. He really safe but is also in a larger format, it should then be fixed to the wall, on the floor or on the ceiling.
Create a space divider build yourself - that is needed:
2 side panels, 147,5 x 35 x 3cm
Top and bottom, 153.5 x 35 x 3cm
3 partitions, 147.5 x 35 x 2.5 cm
12 floors, 35 x 35 x 2.5cm
10mm wooden dowels and wood glue
Drill with stop
Build a space divider itself - how it's done:
Step 1: Drill the dowel holes
A.) The first step is the most time-consuming step, and at the same time the step that needs to be carefully carried out. There the dowel holes are now drilled and namely if they are not exactly match the items later not right together.
B.) We start with the two 3cm thick sidewalls. You get three dowel holes in the narrow upper and lower Katen. In addition, the side walls receive the dowel holes that are required for the floors. Three dowel holes are drilled per floor for that are placed so that the fields between the floors are 35cm tall. After the side walls are 2.5 cm thick partition walls in the row. And the intermediate walls each receive three dowel holes in the narrow top and bottom edges and in each case three dowel holes per tray. The floors get the dowel holes in the narrow side edges and here the holes are accurately to the holes in the side and intermediate walls.
C.) are yet the lid and the bottom of the series as the last value. These wood panels are provided with five rows of dowel hole, the side and the partition walls are placed in the later. In practice, drilling the dowel holes simpler than it sounds in theory, but is in fact important that the dowel holes match.
Build partitions itself
Step 2: Assemble the room divider
If the dowel holes completed, the hardest part is already done and the assembling of the room divider is now quite fast. The assembly begins with the ground and the left side part. Here wood glue is added to the dowel holes and applied to the joint surface, the wooden dowels are turned and the side wall is placed on the base plate. Next, the first three shelves are pegged to the side wall and glued. After the first partition is attached, on the follow the next shelves. This will now be continued, until the right side wall is achieved. Finally, the cover is then plugged and thus the self-built room dividers finished.


0 comments:
Post a Comment