It is built out of a plate of pine plywood that has come to light while cleaning up the shop again.
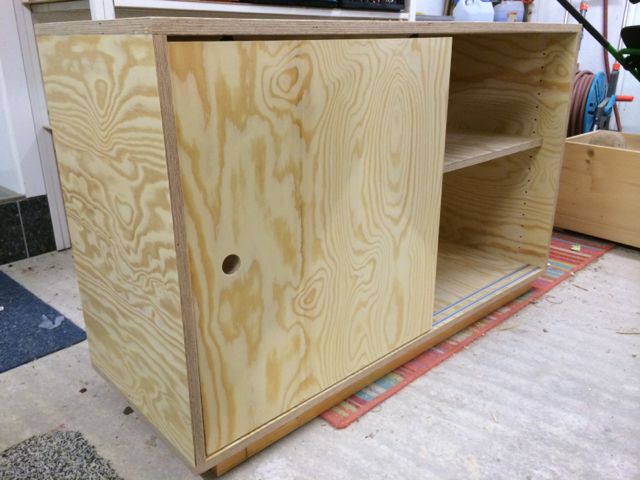
This project aims to build a tailor-made sideboard that matches with my son Christian in a niche in his room. And because space is a little tight to go there, it should get sliding.
The body
The building material is a plate 18mm thick Polish pine plywood in quality S / BB with dimensions 1240 * 2400mm. The dimensions are therefore chosen so that the entire cabinet of this plate can be built.
The depth of the cabinet is 34cm, height 60cm and width approximately 110cm. Therefore, we saw across three stripes of the plate, each 34cm width. The resulting parts have such a length of 120cm. A plate is divided in the middle and both sides of the results in the body, the other plates forming the bottom and lid.
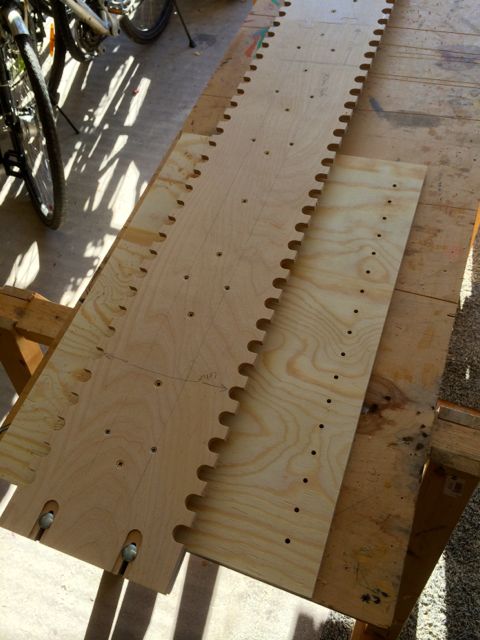
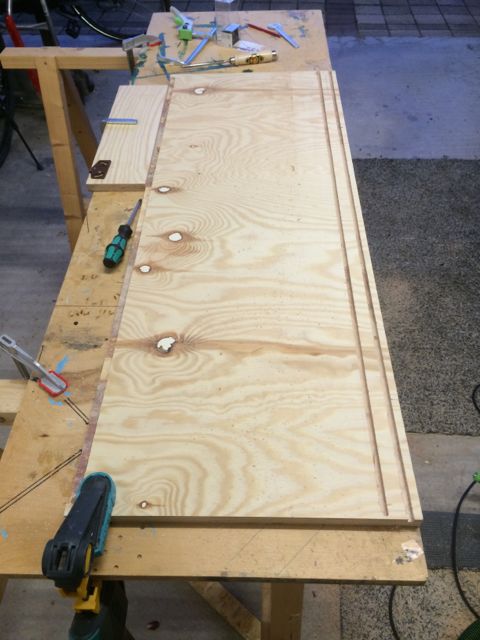
The two side panels were provided with two rows 5mm holes spaced 32mm to be as flexible as possible later when inserting the shelves. As my tool Festool Router OF 1010 with 19mm copy ring and my proven template was used.
Thus, the parts are ready for the body and it's time to familiarize yourself with the installation dimensions of the sliding door fittings.
I've used the Slideline55 fittings . These are available in a version for plastic guide rails and in a version for aluminum guide rails. I have chosen here for the aluminum version.
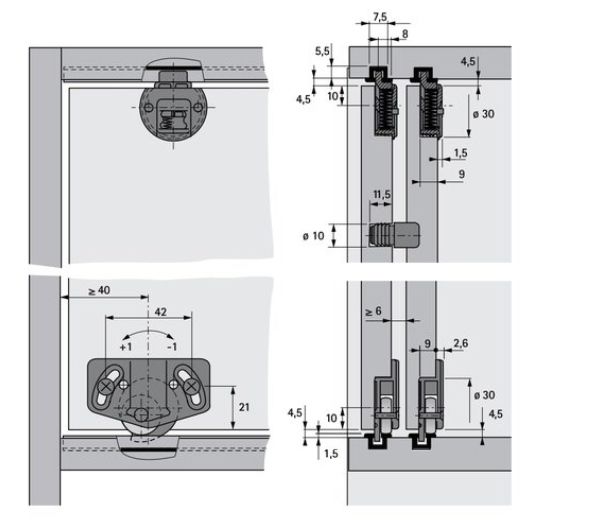
Where have to be milled into the ground and cover the slots? For this, a little to be expected:
Material thickness 18mm minus fitting bore 9mm 9mm gives residual material.
The guide rail itself is 12mm wide with a 3 mm wide slot. Thus, approximately 4.5mm pad for the guide rail is needed. Theoretically, one could thus mill the slot of the first guide rail 4.5 mm away from the front edge. (9 to 4.5) But since 4.5mm plywood are the stand because not very stable, I have decided to make the first milling around 10mm away from the edge.
The grooves on the aluminum rails must be 7.5mm wide and 5.5mm deep milled. Since there is no 7.5mm Straight bits, followed by milling with a 6mm cutter in two passes. With the rip fence as a guide and fine-tune the work very well.
Sideboard13
Note: I had first thought I take as just a 8mm cutters and milling a slot - half millimeter will make already nothing. Forget it! Does not that then Führunsschiene wobbles around in the slot. This test luckily I had made in a residual piece of wood, so no damage to the right components.

Now it was time to determine the distance of the second rail. Planning at least 6 mm distance between the door surfaces are needed here. This means 6mm plus the rest of 9mm thickness of the door - ie a distance of 15mm from the center of the first milling until the middle of the second milling. Since I was not sure if that fits so, I once made the "Pass sample" and everything marked with lines. It fits!
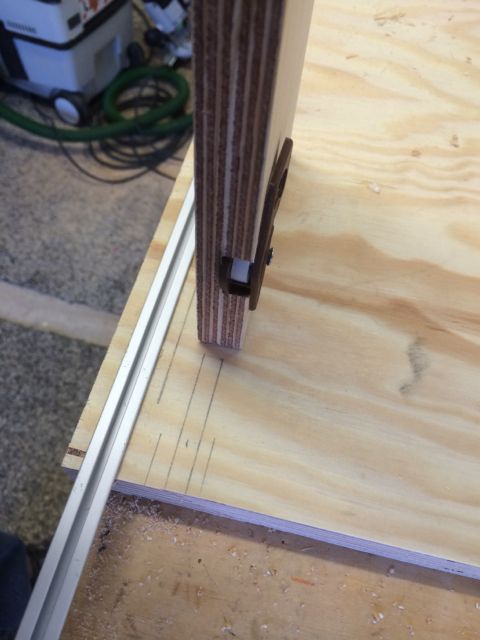
With the respective same same setting on the router could be milled up and down because the guide rails must be perfectly aligned.
At the rear then a groove was still milled, in which the rear wall is used.
Sideboard04 Here, the depth setting of the milling machine was moved and there was an unsightly corner. Since it is located on the back and is later not to see, I can live with it.
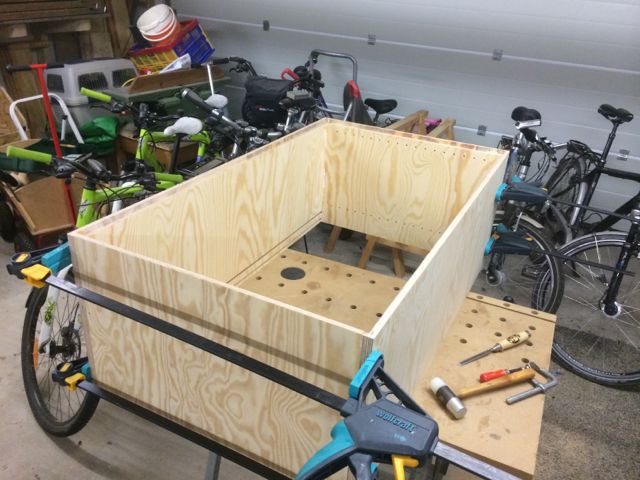
The next step was the assembly of the body. Here come Flächdübel size 20? Used. The parts are each applied to a large angle, which I have built for me to work with the biscuit jointer.
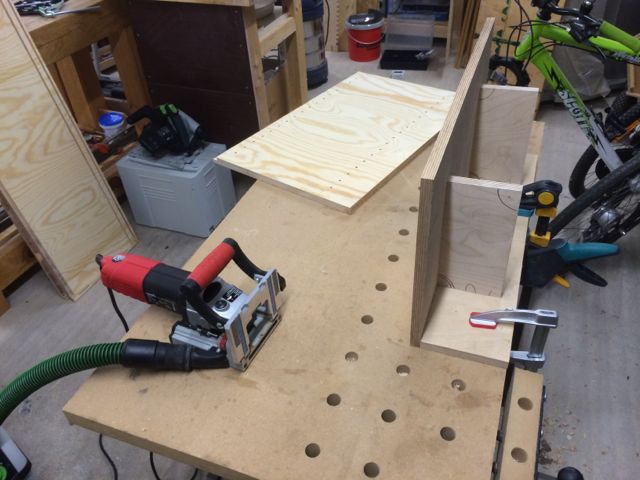
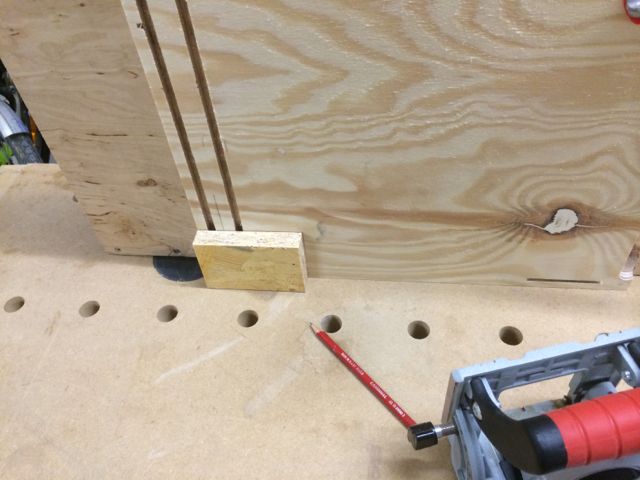
When the biscuit position but one must make sure that the front milling is slightly behind, so as not to collide with the slots on the rails. With a piece of wood as auxiliary dimension then the position penciled always in the same place werden.Sideboard16
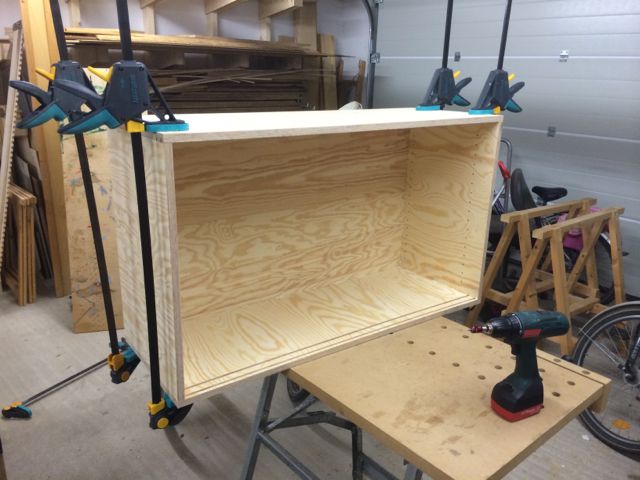
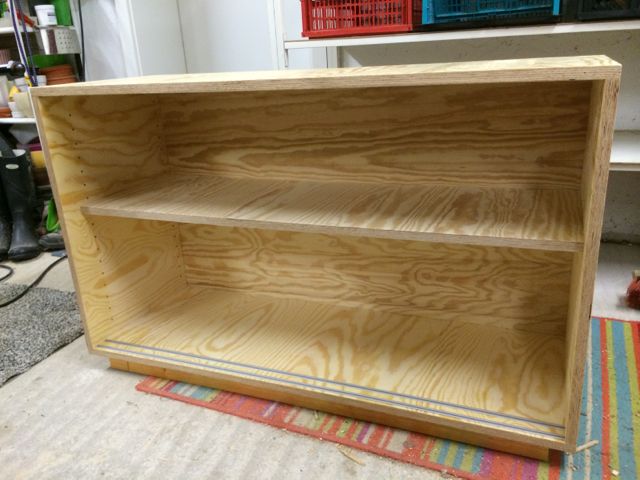
The body is then glued and fixed with clamps. By diagonal measurement you can make sure everything is in balance. Fortunately fits everything, only a small Different and can be corrected later with the onset of the back wall.
The back wall is made of 10mm pine plywood and is fixed with white glue and some backplane screws (flat head screws) the size 3 * 25.
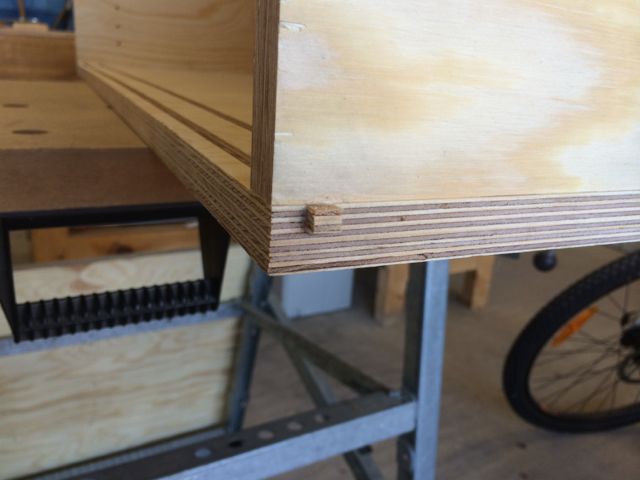
In the heat of battle I had durchgefräßt with a slit to the edge. The resulting hole was sealed with a small glued-block and cut off flush. Now everything is allowed to dry and tomorrow it goes.
The sliding doors
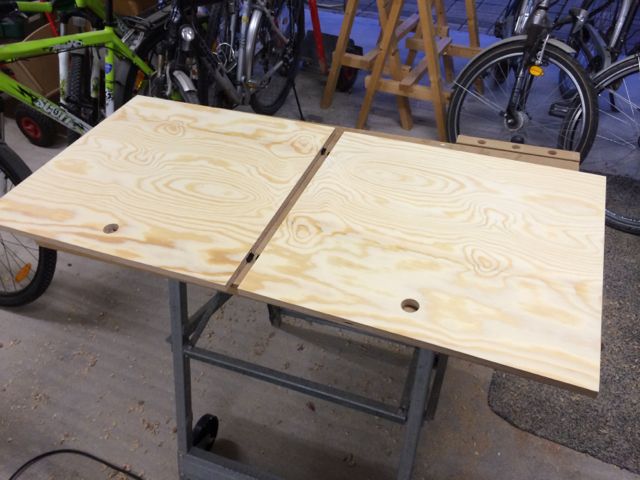
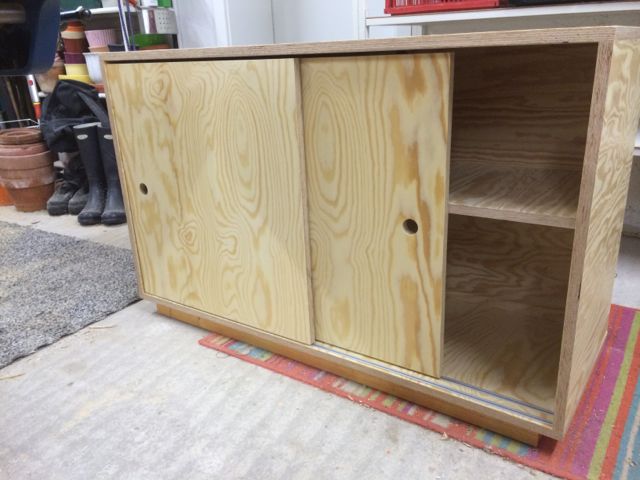
The sliding doors are next in line. The internal dimension the sideboards is 60cm high. Since the sliding doors need each 4.5mm air up and down, the doors are 59,1mm high. The sideboard is inside 106cm wide. Thus each sliding door 53cm plus an overlap of 4 cm wide. So that makes a measure of 59.1 * 57 cm.
In order to move the doors I have just drilled 30mm holes. If desired, can I still use later recessed handles, but now the only remains then another.
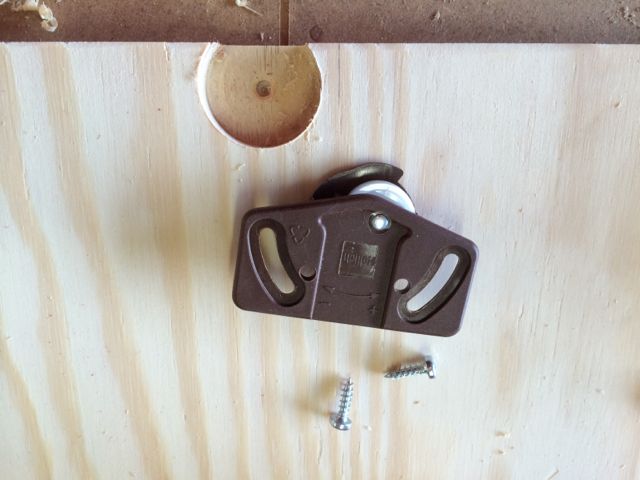
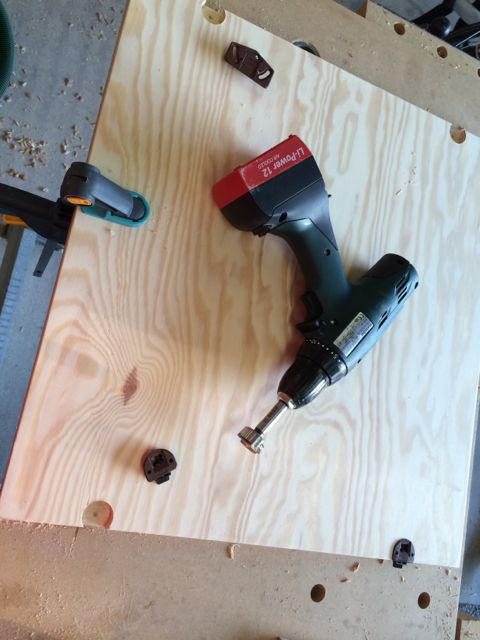
Sideboard25Die sliding door fittings need 9mm deep holes with 30mm diameter. That's a good Forstner bit and a powerful cordless screwdriver to do well.
Role fittings are then inserted and screwed down with round-head screws 3.5 * 16. You can later adjust even the angle of the doors so that they also include clean about the inclination of the fittings. Therefore, until you tighten these screws is not quite as tight.
The upper sliding fittings are spring-loaded peg in a round housing. These are simply pressed into the holes and ready.
Completion
Now the time had come to treat the surface of the sideboard. Here comes again the Woodwax from Adler to use. I had already used the Solid wood cabinets and am always thrilled, because it dries quite quickly for a water-based furniture wax.
All wood surfaces were painted twice with it and after about 12 hours of drying time polished with sheepskin on the plate.
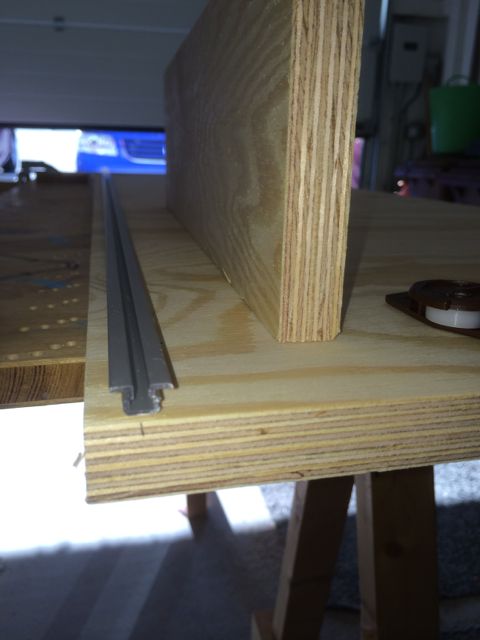
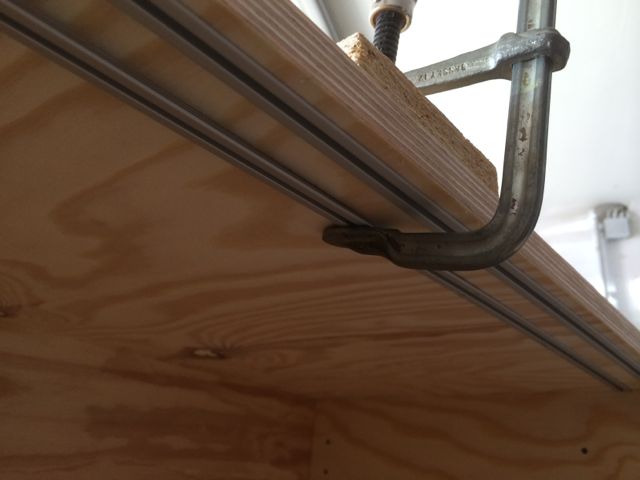
The pressing of the guide rails was carried out in sections, using a clamp and a wood block. So I was able to press in the rails sensitively and without scratches or dents in the slots.
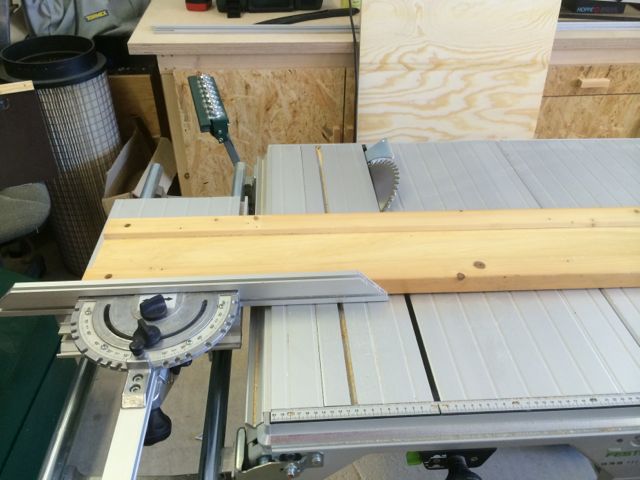
As a base I still sawn pine strips 40 * 40mm from parts of an old solid wood cot. The sections were done with 45 degree miter. Then lengthwise separated. The sides were already painted and finished as the strips needed to be screwed only under the body.
The final step is the making of a false floor. This is cut from the last vestiges of 18mm plywood. As a shelf support 5mm bolt with collar used.
Still and lock the doors now - done!
Statistics
Because I am often asked, here some statistics about the project:
Duration of the whole work a total of approximately 12 hours that were distributed in several 2-3 hour stages over a weekend.
Tools Used:
Diving circular saw Festool TS55
Festool OF1010 router
Bosch random orbit sanders PEX400 AE
Biscuit Joiner Casals / Freud
Metabo Cordless Screwdriver
Material :
Plywood board 120 * 240cm in 18mm
Sliding door fittings
Sliding guide rails
White glue, flat plugs, screws
Woodwax Finish (1/4 can)
Total cost of material so around 92 EUR. This may seem a lot, but the sideboard is made of solid pine plywood, and thus stable for eternity. No comparison to pressboard. The high-quality aluminum rails of sliding doors are certainly not necessary comparable rails in plastic would have cost a total of just 5.50 EUR. So a considerable savings potential. But since I want to build in the near future a very large shelf with sliding doors I wanted to gain experience with the installation of aluminum rails.
What could be easier in this project?
Who also wants to build as a sideboard, but not so much mold has, I can give the following advice:
The wooden parts can be can be sawing the timber merchant, so you do not need Circular Saw.
Instead of the biscuit could simply screw together the carcass, so that one does not need a flat anchor made. (Confirmat- or Spax screws with cap or pocket holes)
You can simply drill each 4 holes only in the middle instead of the entire row of holes. This saves a lot of time and you also do not need drilling template.
Anyway, I have learned a lot again and am now in a position to allow larger projects with sliding doors in attack. Be surprised.


0 comments:
Post a Comment