Since I still had to adapt to the knowledge and realities gained during the construction of the building plan, I could not put as first planned along with the video online this.
The plan consists of several views that describe the structure of the table. These can be selected by clicking the tabs at the top of the drawing.
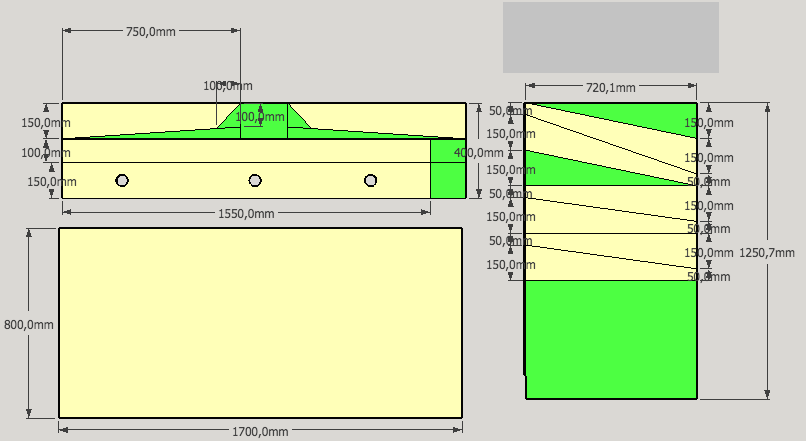
Opposite the SketchUp drawing shown in the video, some minor adjustments have been made concerning the actual measurements. And it was complemented a detailed drawing, which describes the distribution of plywood for cutting.
Marked in green are the remaining pieces, beige are the parts of the table.
An important change has arisen during the cutting: the sides of the table frame are not cut from the plate pieces for the legs but from the remaining piece of the frame.
The reason is that I have built for the tables of varying heights. Depending on the height of the user can be high, a table between 62 and 72cm. Accordingly, the dimension of the plate for the legs change. It is shown here with 72cm in the plan - a measure that should fit in normally. However, the side panel must be 75cm wide and the saws more easily from the remaining piece of the frame.
If you want to reduce the table in length, which can simply cut the two crossmember, and then shrink the table accordingly.
Tool list:
Next tool is the basis for this project and therefore the minimum facilities:
Good hand circular saw with guide rail
Cordless Screwdrivers
Not absolutely necessary but time-saving and useful are:
Eccentric or orbital sander
Small router 3mm Rounding
Material List
If you want to recreate this table, which requires the following material:
1 plate 125 * 250cm 24mm Multiplex (birch or beech)
10 pieces Spax countersunk 6 * 70 or 10 pieces Screw Confirmat 7 * 70
25 pieces countersunk screws Spax 4 * 40
10 pcs screws with countersunk head Spax 4.5 * 70
For the surface treatment:
Sandpaper grit 120, 240, 320
Pore filler / resin varnish for tabletop
Colorless glaze for substructure
Surface Treatment
Since I have reached a number of questions for the surface treatment here my approach:
High-quality 5-star brushes are required for such a project.
Coarse roughing of all wooden parts before assembly with 120 paper. Thus, not only the surface is smoothed, there is also the small amount of debris from the Transport & Storage plates removed.
After assembly of the side panels, the frame of all tables were treated twice with a colorless glaze, sanded after each coat of 240 paper. I've been working here very gently with the BOSCH PEX 400 AE random orbit sanders. Those who do not orbit sanders or Schwigschleifer can also just enjoy it go with a sanding block by hand. Since only the conditions laid down by the glaze wood fibers here are smoothed, that is by hand not a big deal.
For the tabletop, it is advisable to drive a little more effort, as a glaze is not very resistant to abrasion. Because even the building of the Dutch Tool Chest present, I have dealt with here, the table top on both sides twice with CLOU quick sanding sealer and sanded each with 320 paper. Thus the surface is non-porous and completely smooth.
Then the top of the table top was sealed with colorless CLOU resin paint at the end. This results in a smooth, abrasion-resistant and quite robust tabletop.
For all woodworkers who have no desire for the surface treatment there's an alternative: screen printing plate! computisch31Vom construction of the milling table I still had a remnant of a 30mm screen printing plate left. This we have used for one of the tables as a table top. 30mm is obviously unnecessarily thick, but very stable and was at hand.
One could of course build the whole table of 24mm plywood panel - which then results in a smooth, dark brown furniture. At the splices, however, the coating must be sanded, otherwise the D3 white glue does not hold.
Assembly
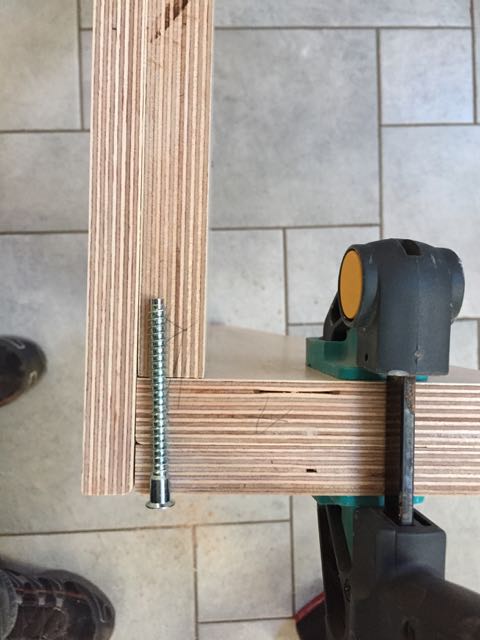
I have used for the assembly of the table frame Confirmat screws. The reason is that it just goes very quickly. Hole drilling, Confirmat screw screw, finished! The Confirmat Step Drill drills and lowers all in one visit.
But it is of course easier: Drill a 5mm hole, countersink the hole and then screw in a 6 * 70 SPAX screw with feeling. The important thing is that the screw has a largest possible diameter (6mm) and long enough (70mm) is. Only this can introduce the transverse forces occurring during the move of the table in the wood.
But beware: The order in which the screws are screwed important! First, tighten the two screws in the front of the two rear crossmember. This ensures that the side parts and the cross members abut without a gap. Only then the two rear screws are mounted. So you get a stable base that also lateral loads - eg easily coped with - when you move the cluttered computer desk.
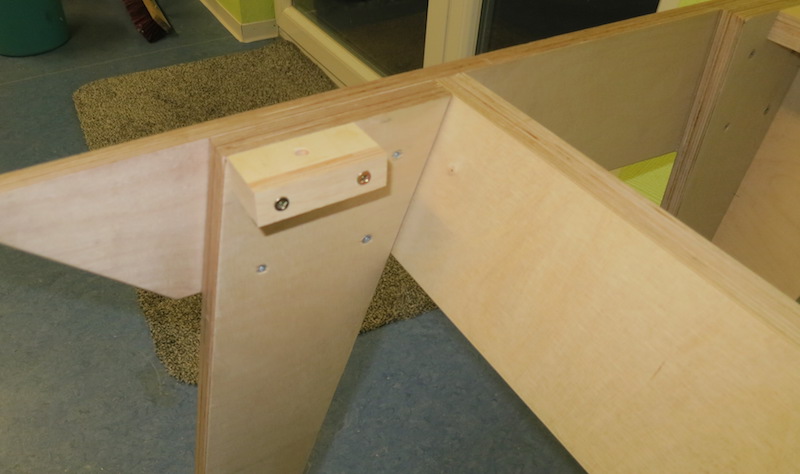
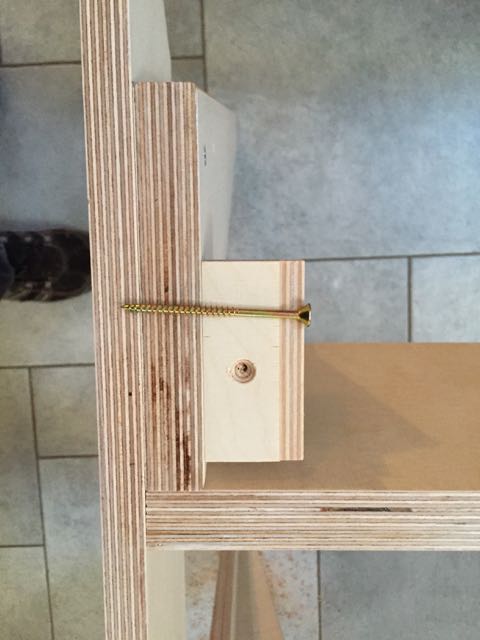
The blocks for screwing the table top are attached with fairly long 4.5 * 70 Spax screws with partial thread. The pads are made of a narrow remaining strip on a halved in thickness strip is glued with multiplex of transverse grain. This effectively prevents the splitting of Nog when the screws are tightened.
Construction of the first table I had slanted the front crossmember on top at 20 degrees. This looks at the video and also in the picture.
But this has proved necessary as not mandatory and the other tables had here a rectangular section. It is only important that during assembly the upper front edge of the cross member with the upper side of the side parts is flush.
Close-ups
Below are some detailed pictures of the finished computer tables.
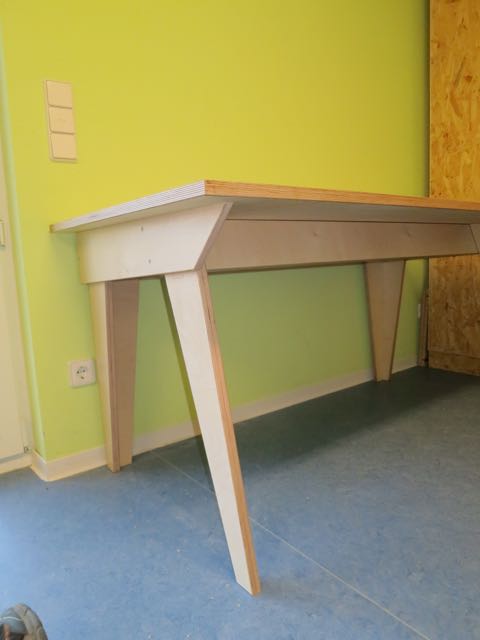
Here's a look at the rear of the table. The two outer holes on the back, we had unfortunately misplaced the first table.
Therefore, the holes were drilled further inward again.
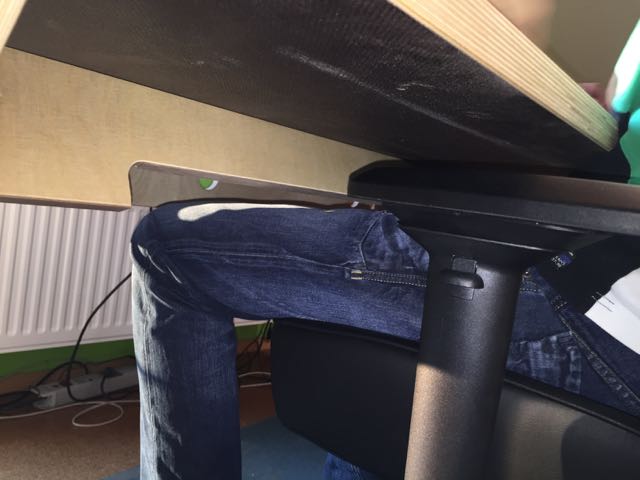
A look under the table:
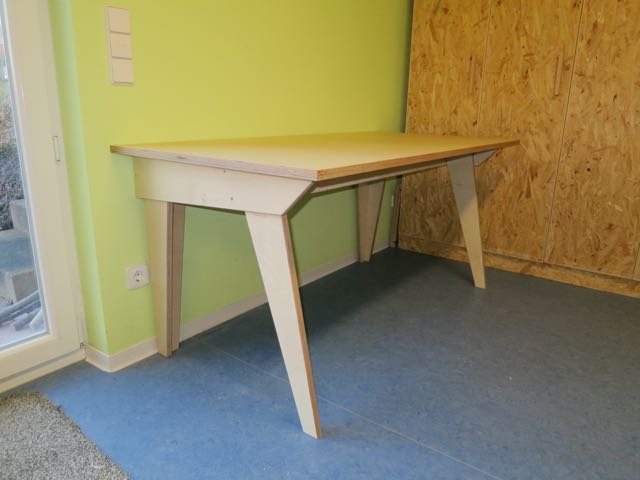
Finally, the image of a finished computer desk:


0 comments:
Post a Comment